Interfacing 20 X 4 LCD Display with NodeMCu
- Ankita Sharma
- Dec 31, 2020
- 4 min read

Updated: Sep 22, 2024
The Internet of Things ( IoT) aims towards making life simpler by automating every small task around us. Alerts play an important role in IoT developments to notify the user about something important. It can be either in the form of LCD Display messages, Gmail notifications, LED indication / SMS alerts, or any other form.
In this article, we will learn the interfacing of 20 X 4 LCD Display with NodeMCU using the I2C communication module to display messages regarding the task performed by our IoT projects.
Hardware Components :
The hardware components required for the interfacing are as follows -
Breadboard :

They are basically a construction base used for prototyping electronic circuits. #Breadboards allow us to make quick connections between hardware components, without soldering.
Buy Breadboard from here.
NodeMCU :
Let us understand what is NodeMCU?

NodeMCU ( Node MicrocontrollerUnit ) is an open-source development board for creating IoT project prototypes. It is having integrated support for WiFi connection. Also, it is very cost-efficient as well as consumes less power. It allows us to use it as a micro-controller and manipulate input and output.
Buy Esp8266 from here.
I2C Module :
Let us understand What is the I2C Module?

It has an inbuilt chip that converts I2C serial data to parallel data for an #LCD. Directly interfacing LCD takes a lot of pins on the NodeMCU development board which makes the circuit more complicated. That is why interfacing is done via the I2C module. I2C module consists of four pins - VCC ( Power Supply ), GND ( Ground ), SDA ( Serial Data pin), SCL ( Serial Clock pin ).
Buy I2C Module with LCD from here.
LCD :

#LCD ( Liquid Crystal Display ) are mainly preferred for multi-segment light-emitting diodes and seven segments.
Buy LCD from here.
Jumper Wires :
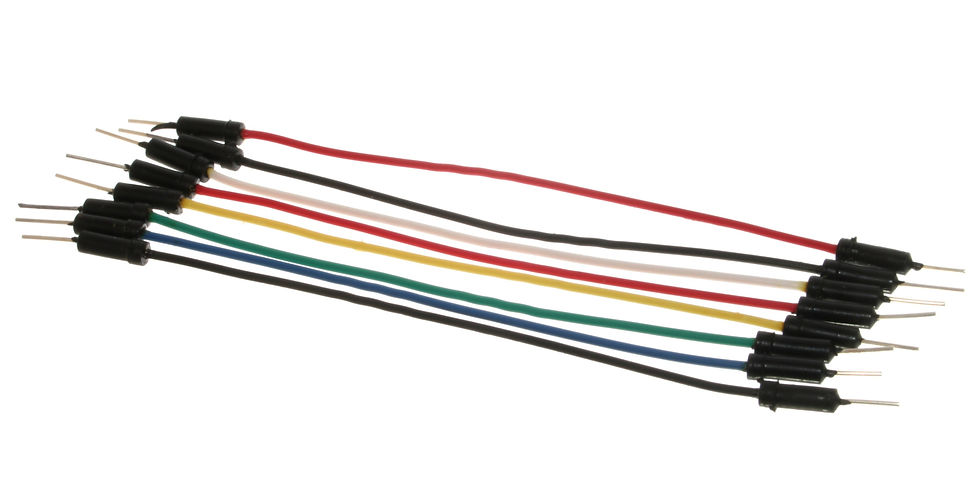
Jumper wires are the connecting wires that have connector pins at each end, allowing them to be used to connect the two points without soldering. They typically come in three versions - male-to-male, male-to-female, and female-to-female.
Buy Jumper Wires from here.
USB Cable :

#USB ( Universal Serial Bus ) Cable is used to connect the development boards ( ESP8266 in this case ) to the system ( For eg: Laptops ).
Buy USB Cable from here.
Software required:
Arduino IDE :
Let us understand What is the Arduino IDE?
Arduino Integrated Development Environment is open-source software that facilitates the development and uploading of codes to the microcontroller. Program written in Arduino #IDE is called Sketch. These Sketch files are saved with the file extension ino.
Click on the link to download the software.
Circuit Connections :
The circuit connections for this interfacing are as follows -
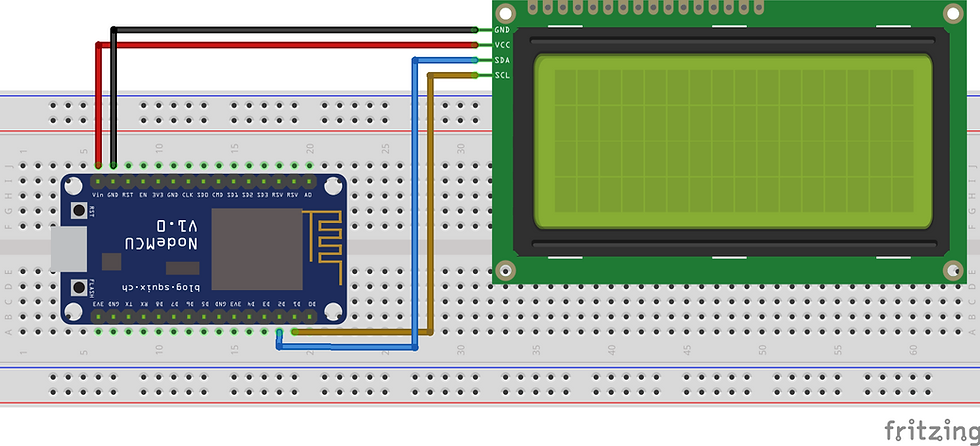
Vin pin of NodeMCU is connected to the VCC of LCD.
GND of NodeMCU is connected to GND of LCD.
D1 pin is connected to the SCL pin of the LCD.
D2 is connected to the SDA pin of the LCD.
Code :
Working :
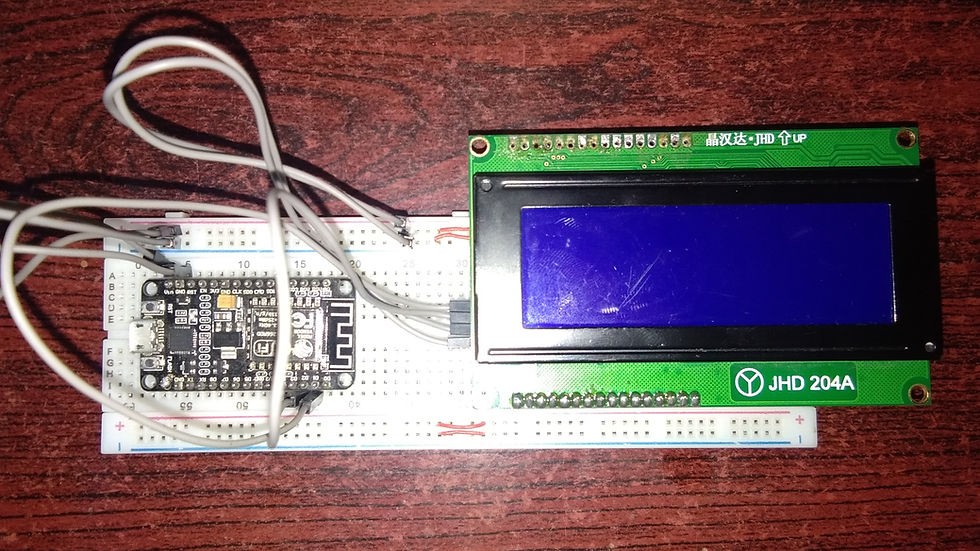
Once the hardware connections are completed and the code is written, connect the ESP8266 board to the system via USB cable. Now, upload the code to the board and then run the program.
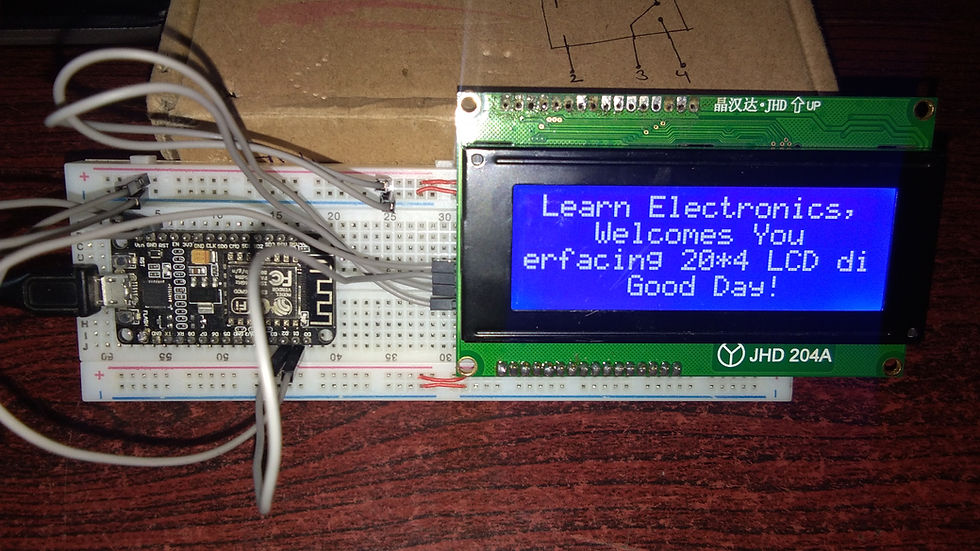
A message will be displayed on the LCD screen as shown in the above image. This indicates the successful interfacing of LCD with NodeMCU.
Do watch the video given below to get a better idea through practical implementation.
Check the Project working video here - Interfacing 20*4 LCD Display with NodeMCU
Video By - Harshit Gupta
Conclusion :
This article gives an overview of #interfacing LCD with NodeMCU to get important messages displayed on the LCD screen. It is the basic interfacing that is used in almost all #IoT projects and developments to track information with just a single glance.
See more projects on NodeMCU :
Order Electronics Projects
Want us to guide you through your project or make the project for you? Click on the button below or reach out to us via Call/WhatsApp at (+91) - 7600948607
You can -
Order Basic Electronics Projects
Order Embedded Systems Projects
Order IoT Projects
Order FPGA Projects
Order VLSI Projects
Order Image Processing Projects
Order Matlab Projects
Order TinkerCAD Projects
Order Proteus Projects
Click on the button below to fill out the project inquiry form -
Create Various Projects
Check out our Free Arduino Projects Playlist - Arduino Projects
Check out our Free Raspberry Pi Projects Playlist - Raspberry Pi Projects
Check out our Free TinkerCAD Projects Playlist - TinkerCAD Projects
Check out our Free IoT Projects Playlist - IoT Projects
Check out our Free Home Automation Projects Playlist - Home Automation Projects
Check out our Free NodeMCu Projects Playlist - NodeMCu Projects
Follow us -
Please do follow us i.e. #learnelectronicsindia to get daily updates about new blogs, videos, courses, products, offers, competitions, quizzes, and Internship Opportunities.
Informative and concise! LearnElectronics India always delivers quality content.
Learn Electronics India has done a remarkable job with this blog post. The comprehensive coverage of interfacing a 20 X 4 LCD display with NodeMCU was exactly what I was looking for. This blog has become my go-to resource for electronics projects. Highly recommended for anyone interested in exploring the world of NodeMCU.